Sweet Cocoa Paste: A Masterclass in Chocolate Tart Shells
Beyond the Basics: Introduction to Pâte Sucrée Cacao
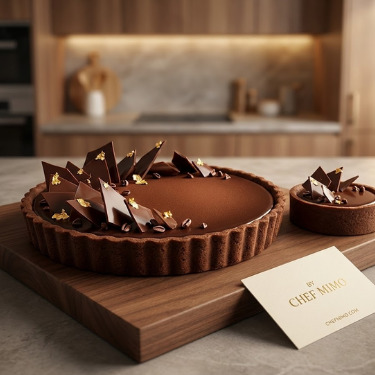
While a classic vanilla tart shell is a staple, the Sweet Cocoa Paste (Pâte Sucrée Cacao) is the sophisticated, dark foundation required for rich chocolate ganache tarts, coffee desserts, or vibrant fruit fillings like raspberry or orange. It is not simply a matter of adding cocoa powder to a standard recipe; it requires rebalancing the fat and dry ingredients to avoid a bitter, dry crust.This specific recipe uses the Creaming Method (Crémage), where soft butter and sugar are mixed first, rather than the "Sanding" method used for shortcrust. The result is a dough that is slightly more compact, less flaky, and more cookie-like, providing the structural integrity needed to hold heavy fillings without becoming soggy. It yields a shell with a deep, dark color and a texture that snaps cleanly, melting in the mouth with notes of toasted almond and chocolate.Ingredients
- Cocoa-sweetened dough :
- 90 g powdered sugar
- 25 g unsweetened cocoa powder
- 120 g softened butter
- 2 g salt
- 30 g almond powder
- 1 egg
- 210 g flour type 55
Mastering Textures and Flavors📗 Download your PDF now!
Instructions
Cocoa pastry :
- You can make this recipe either in your food processor fitted with the leaf (the flat whisk) or by hand in a salad bowl.
- If your butter is too cold and too hard, you'll need to work it a little. It needs to have a “creamy” texture for the dough to be homogenous.
- Sift together the powdered sugar and cocoa powder.
- Pour the butter, powdered sugar, cocoa, salt and almond powder into your bowl. Mix at slow speed to avoid foaming the butter.
- Add the egg and continue mixing. If your dough is not very homogeneous, don't hesitate to use a maryse or a horn to scrape the bottom of your bowl.
- Add the flour and knead at medium speed. It's best to knead as little as possible and stop as soon as the flour is incorporated into the mixture, even if it doesn't form a nice ball of dough.
- The more you mix, the crumblier your dough will be, the harder it will be to work, and the more fragile it will become once cooked.
- Place the dough in cling film. Crush the ball with the palm of your hand to make as flat a disk as possible.
- This will ensure that your dough is compact and roughly in the right shape to roll out, and will chill faster in the fridge.
- Leave your chocolate dough to rest in the fridge for an hour.
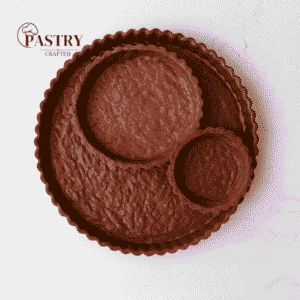
- Flour your work surface and your dough, then roll it out, taking care to give it a 1/8 turn between each roll. This ensures that there's always enough flour underneath, and that the dough glides smoothly and doesn't stick to your work surface. It also helps to keep the basic round shape (who hasn't ended up with a square after rolling out their dough?).
- Roll your dough out on your rolling pin and unroll it onto your circle or tart tin. If it breaks, don't panic - the advantage of sweet dough is that it will come together again when baked.
- Take the edge of the pastry that's sticking out of the circle and slide it over, pressing it down with the fingers of your other hand so that it sticks tightly against the edge of the circle. If you push the dough from the inside, it may tear.
- Then, using your fingers, gently push the dough into the circle at a right angle. You've just done what we call “darkening” a tart!
- Finally, with a small knife, cut off the excess pastry by sliding the blade against your circle or tart tin.
- Finally, you'll need to let your tart rest once more in the fridge. This isn't essential, but it will prevent the pastry from shrinking or the edges from falling off during baking, so don't skip this step.
- Preheat your oven to 170°C fan-assisted, prick your tart with a fork to prevent air bubbles from forming during baking and put your pastry in the oven for 15 min.
Notes
The Science of Ingredients: Chemistry of Chocolate Dough
Working with cocoa powder changes the physics of pastry. Here is why this formula works.1. Cocoa Powder (The Moisture Trap)
The recipe substitutes a portion of flour with 25g of unsweetened cocoa powder.- The Science: Cocoa powder acts as a starch and a drying agent. It is highly hygroscopic (absorbs moisture) and contains more fat than flour (cocoa butter content). Because it absorbs liquid aggressively, simply adding cocoa to a standard dough makes it dry and crumbly. This recipe balances this by using softened butter and almond powder to introduce extra fat and moisture, ensuring the dough remains pliable and doesn't crack when rolled.
2. Powdered Sugar vs. Granulated
You will notice this recipe calls for 90g of Powdered Sugar (Icing Sugar), not granulated.- The Science: Granulated sugar creates aeration when beaten with butter (good for cakes, bad for tarts). Powdered sugar contains cornstarch and dissolves instantly into the butter without creating large air pockets. This results in a "tighter" crumb structure that is less likely to spread or puff up in the oven, ensuring your tart shell retains its sharp, geometric edges.
3. Almond Powder (The Tenderizer)
30g of almond powder is mixed into the base.- The Science: Almond flour has zero gluten and high oil content. When mixed with the flour, these nut particles physically interrupt the gluten network. This "shortens" the dough, ensuring that even with the drying effect of the cocoa, the final crust remains tender and friable rather than tough or hard.
4. The "Creaming" Method (Crémage)
Unlike Shortcrust (cold butter + flour), this uses soft butter + sugar + eggs, then flour.- The Science: By emulsifying the egg and butter first, you coat the liquids in fat before they touch the flour. When the flour is finally added, it is coated by this emulsion, delaying gluten formation. This allows for a smooth, homogenous dough that is easier to roll out than "sanded" doughs, which can be fragile.
Essential Professional Kitchen Tools
To achieve a professional finish with chocolate dough, specific tools help manage its delicate nature.-
Stand Mixer with Paddle Attachment
- Why you need it: The creaming method requires smooth, "pomade" texture butter. A paddle attachment creams the butter and sugar without whipping in too much air (which a whisk would do). Excess air leads to bubbles in the baked crust.
-
Perforated "Air Mat" (Silicone)
- Why you need it: As mentioned in the notes, a perforated mat allows air to circulate under the tart. This is critical for cocoa dough, which is darker and harder to judge doneness visually. The even airflow ensures the bottom is fully crisp without burning the sugar.
-
Plastic Scraper (Horn/Corne)
- Why you need it: To scrape the bowl efficiently. Cocoa powder is fine and sticky; it loves to cling to the bottom of the mixing bowl. A plastic horn ensures every gram of butter is incorporated before adding the flour, preventing streaks of unmixed fat.
Expert Tips and Success Hacks
Chocolate dough is unforgiving if mishandled. Follow these tips for a flawless finish.1. The "1/8 Turn" Rolling Technique
Cocoa dough sticks to the counter more than vanilla dough.- The Hack: Do not roll back and forth continuously. Roll once away from you, then lift the dough and rotate it 1/8th of a turn (45 degrees). Roll again. This constant movement ensures the dough never stays in one spot long enough to stick, and it helps maintain a perfect circle.
2. The "Darkening" (Fonçage)
Getting sharp 90-degree angles is the mark of a pro.- The Hack: When lining the ring, do not stretch the dough down the sides. Instead, lift the overhang with one hand and gently tuck the dough into the bottom corner with the other. Use your thumb to press the dough firmly against the side of the ring at a right angle. This compacting prevents the sides from sliding down during baking.
3. Patching without Fear
Cocoa dough is brittle and may crack when transferred.- The Hack: Because of the high fat content, this dough "heals" perfectly. If it cracks, simply take a scrap of raw dough and press it into the crack like putty. Unlike flaky pie dough, sweet paste fuses back together seamlessly in the oven. The dark color also hides these repairs beautifully.
4. Stop Mixing Immediately
The instructions warn: "The more you mix, the crumblier your dough will be."- The Hack: This sounds contradictory (usually mixing makes things tough), but with high-fat pastry, overmixing breaks the emulsion, separating the oil. This results in a dough that falls apart like sand. Stop the mixer the second the white flour streaks disappear.
5. The Double Chill
Resting is not optional.- The Hack: You must rest the dough twice: once after mixing (to hydrate the cocoa/flour) and once after lining the tart ring (to relax the gluten). If you skip the second rest, the dough will shrink in the oven, leaving you with a short tart shell.
Frequently Asked Questions (FAQ)
Q1: My dough is too sticky to handle. What did I do wrong? A: Your butter was likely too warm (melted) rather than softened, or your kitchen is too hot. Cocoa butter melts at body temperature. If it's sticky, flatten it between two sheets of parchment paper and refrigerate for 20 minutes before trying to roll it again. Q2: Can I reuse the scraps? A: Yes! As the intro suggests, this dough makes excellent "Chocolate Shortbread" cookies. Gather the scraps, press them together (don't knead), roll out, chill, and cut into cookies. Bake for 10-12 minutes for a delicious chef's snack. Q3: How do I tell if chocolate pastry is cooked? It's already brown! A: This is the hardest part of cocoa pastry. You can't rely on golden color. Look for a matte finish (no shiny/wet spots) and the edges pulling away slightly from the ring. It should feel dry to the touch. It will harden significantly as it cools. Q4: Can I freeze this dough? A: Yes, it freezes exceptionally well. Wrap the flattened disk tightly in cling film. It lasts for up to 1 month. Thaw in the fridge overnight. In fact, freezing the lined tart shells before baking helps them hold their shape even better. Q5: Can I substitute the almond powder for nut allergies? A: Yes. You can replace the 30g of almond powder with an extra 30g of T55 flour. However, the texture will be slightly harder and crunchier. To mimic the tenderness, you might want to add an extra 10g of butter.
Tried this recipe?Let us know how it was!
I’m Chef Mimo, a passionate pastry chef with over 17 years of experience in the world of fine desserts. I specialize in French-style entremets, refined cakes, and creative chocolate work. Pastry is not just my profession—it’s my lifelong passion. Through PastryCrafted.com, I love sharing my recipes, techniques, and inspirations with anyone who dreams of mastering the art of pastry. Whether you’re a curious beginner or a seasoned pro, you’re welcome in my sweet world.
2 Comments
[…] Sweet cocoa paste […]
thank you